Add website to BlogDrip
Before registering your website, please read our terms and conditions to avoid misunderstandings: Publisher Terms
Always make a backup of your website before installing our plugin
BlogDrip will not take any responsibility if our plugin breaks your website, install our plugin at your own risk!
It is necessary to install our plugin on your website first, you can download the plugin here: Download plugin
Then activate our plugin.
If you also want to offer the single link sale it is necessary to also install this plugin: Link Library
Blogdrip is compatible with this plugin and for more information on how to use this plugin you can find it in the manual of this plugin.
Once you have installed and activated the plugins, we will proceed with setting up your website within BlogDrip.
Now go to this page: Add website and then click + on the right side.

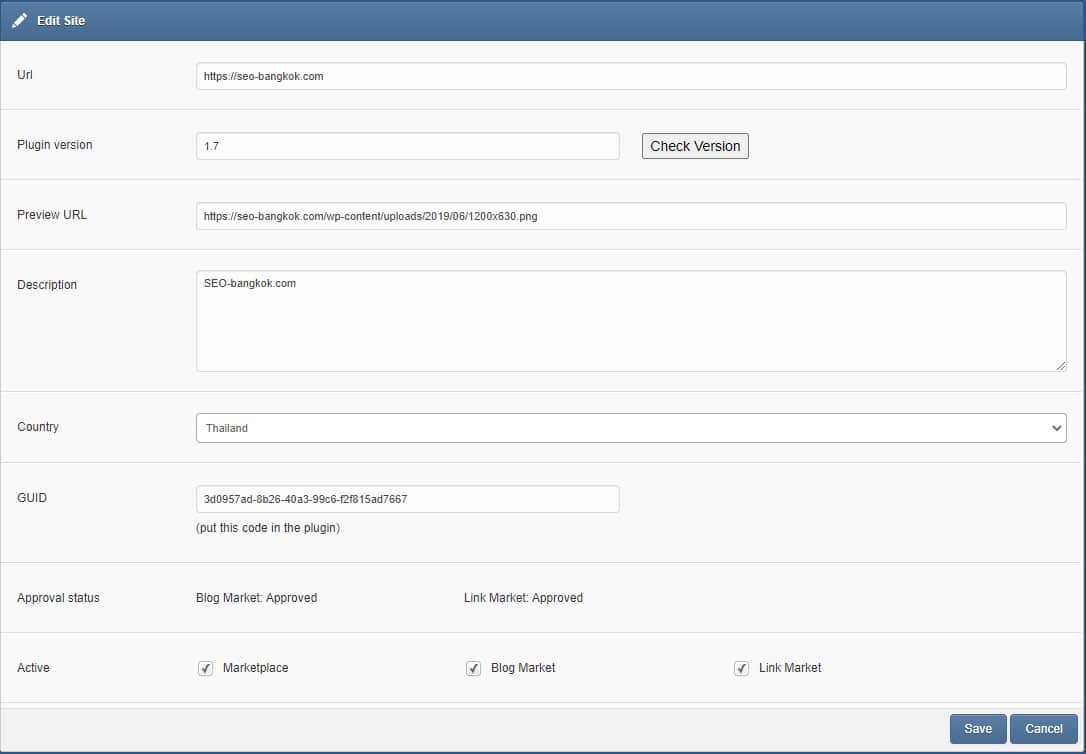
You can now start adding your website
- Url: Enter the url of your website, example: https://seo-bangkok.com make sure you add the url without the / in the end – so not so https://blogdrip.com/
- Plugin version: You can skip this one for now.
- Preview URL: Here you can add the url of your website logo, the best format is 512px by 512px.< /span>
- Description: Enter your domain name here, for example: SEO-Bangkok.com
- Country: Select the country your website is targeting.</li >
- GUID: This is the access code to your website, go to the setting page for our BlogDrip plugin within your website, enter the code and save the data .
- Approval Status: Once your website has been reviewed, the status will change to approved.
- Active: Here you can indicate which services you offer, the Marketplace must be checked first if you want to blog offer placements then select the Blog Market, if you also want to offer individual link placements then also select Link Market. Of course it is also possible to only use our Blog Market or only our Link Market.
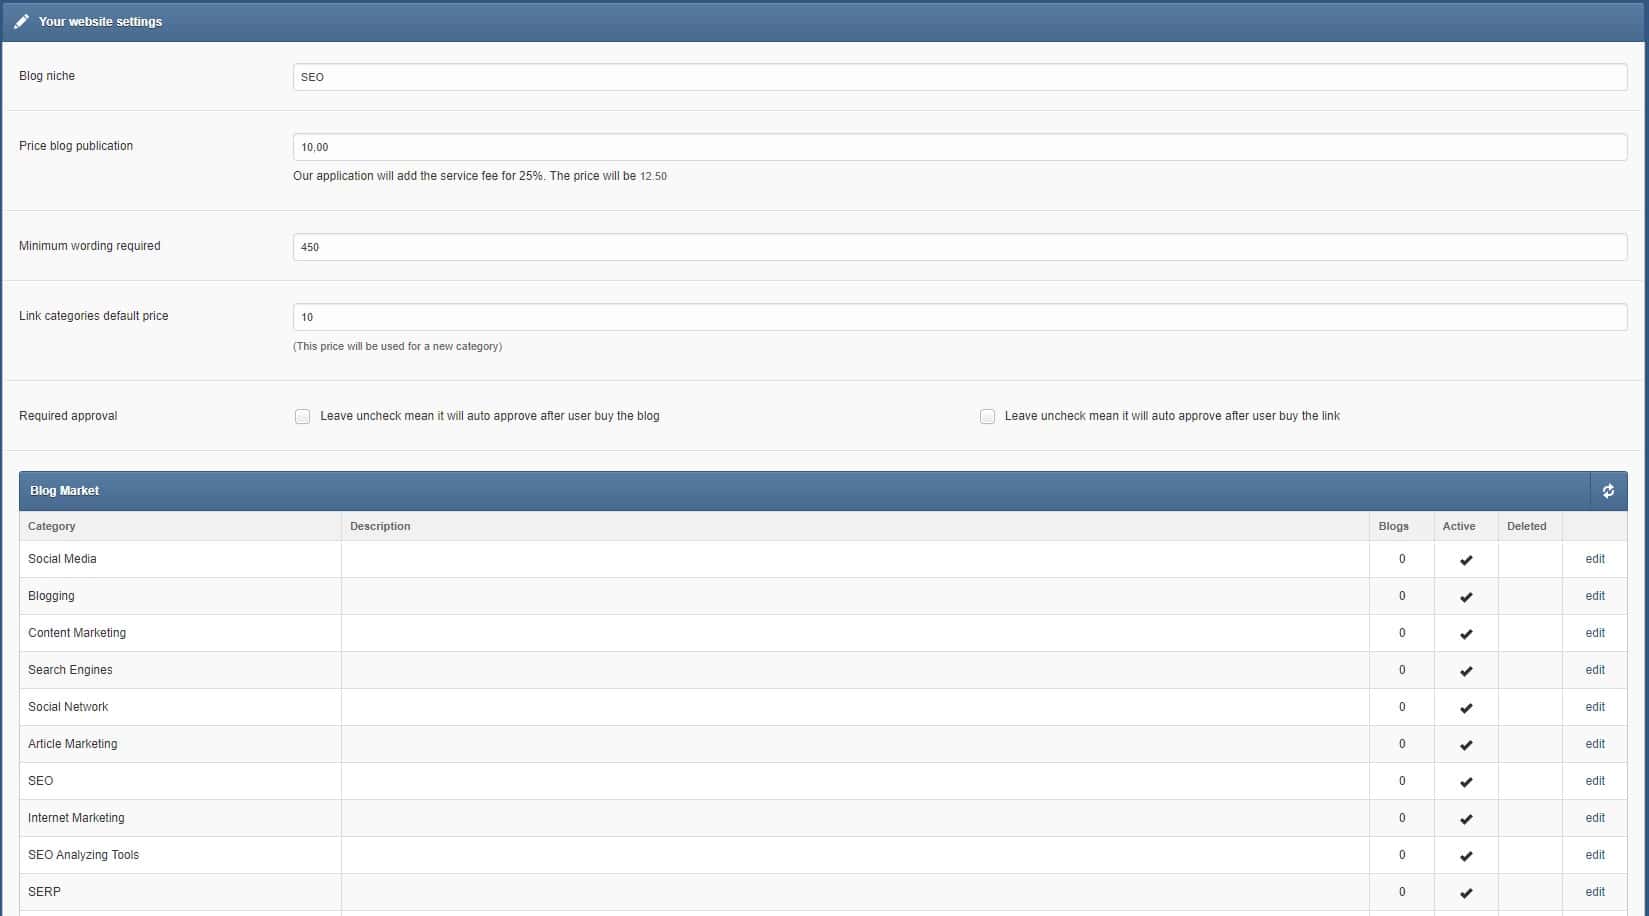
- Blog niche: Try to describe in one word what your website is about.
- Price blog publication: Enter the price you wish to receive per publication.
- Minimum wording required: Enter the minimum number of words to use per publication.
- Link categories default price: If you also want to offer individual link placements, you can enter the price per link per year here, this price will be paid to all available categories. If you have a category with which the link is placed on the homepage, for example, and you want to receive a different amount for this, you can edit that category and adjust the price (this is only possible after you have performed the Sync).
- Required approval: Here you can indicate whether you want the blog / link placements to be placed automatically or whether you want to approve them manually. Please note that if you enable manual checking that applications must be reviewed within 72 hours, if you do not do this, we will automatically approve and publish the applications.
- Then click Save and save the data.
After you have saved the data you will be automatically returned to the overview with your websites, go to the website you just added and click on the link (on the right) “Edit

You will now see the data you just entered:


We now go to the last part.
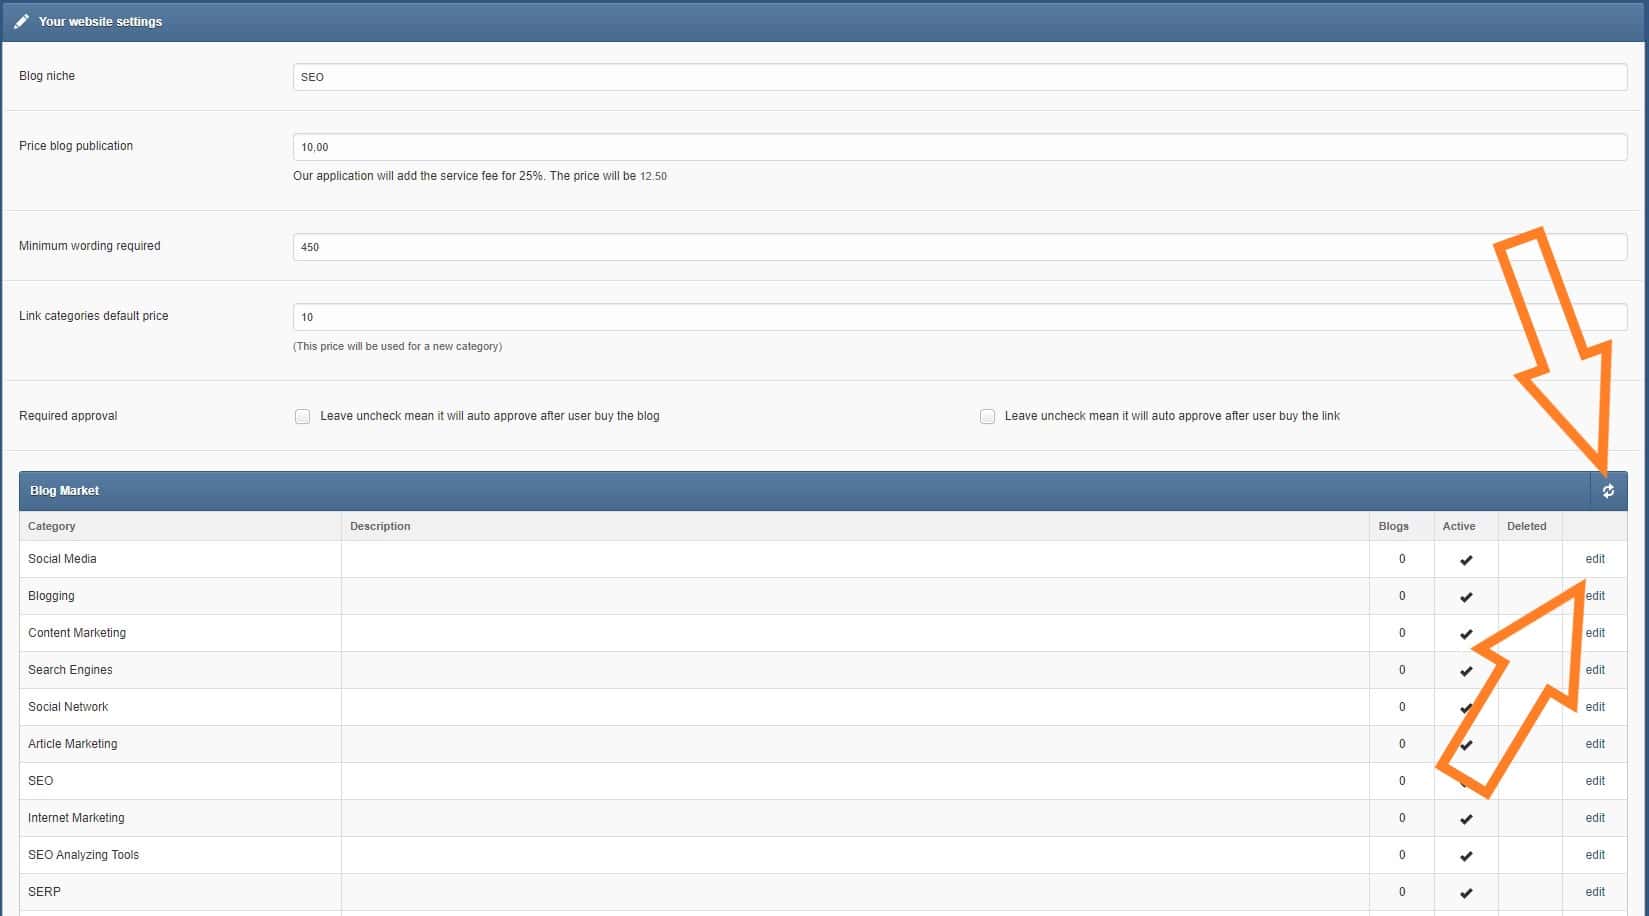
Click the sync button (in the block of Blog Market) as shown in the image:

After the sync, your available categories will be visible, you can edit or toggle each category on/off. There may be categories that you don’t want to make available.
If you have also turned on the single link selling function, the Sync works in the same way and you can edit or switch on/off each category again.
For single link sales you need to install this plugin: https://wordpress.org/plugins/link-library/
With this plugin you can decide for yourself where you place the category on your website, you can easily create categories with which you can place links on, for example, your homepage or partner page.
When you are done with this, you will see a button at the bottom of the page with which you can save the data.
As soon as the data has been saved, we will receive a notification that we have to inspect your website, we aim to check every website within 24 hours.
If there are any questions, please feel free to contact servicedesk@blogdrip.com